Open Concept Kitchen: Removing Walls, Costs & Design Considerations
An open concept kitchen removes or reduces the walls between the cooking area and the rooms beside it, so the kitchen, dining space and living room read as one connected space. It is one of the most requested changes in home renovation. It is also one of the more demanding, because a wall that looks like a simple divider may carry the weight of the floor above, or hide pipes, wiring and ducts.
This guide covers the full project: what the layout is, what you gain and give up, how wall removal works, what drives the cost, and how to design the result so it looks intentional rather than empty. It also covers practical matters such as ventilation, noise, storage and small-space adaptations.
The article does not quote specific prices. Costs vary widely by region, house construction and finish level, so the cost sections explain what pushes a budget up or down and how to check those factors against local quotes.
Whether you are weighing the idea, planning a remodel or comparing layouts, the sections below move from the decision to the structure, the money and then the design details.
What Is an Open Concept Kitchen?
An open concept kitchen is a kitchen that shares space with the dining area, living room or both, with no full-height walls or closed doors between them. Cooking, eating and relaxing happen within sight of one another. Boundaries may still exist, but they are created by furniture, an island, flooring changes or lighting rather than by walls.
The terms “open plan” and “open floor plan” are often used interchangeably, and in everyday use they mean much the same thing. “Open plan” is the more common phrase in British usage, while “open floor plan” and “open concept” are common in North American listings. A slight distinction is sometimes drawn: open floor plan can describe the whole main level flowing together, while an open kitchen may refer to just the kitchen opening onto a neighbor room. Either way, the defining feature is the lack of walls separating daily activities.
The layout became popular because it matches how many households live. The cook is no longer isolated from family or guests, children can be supervised from the counter, and a modest home can feel larger when the eye travels across several zones. It also suits entertaining, since the host can prepare food and stay part of the conversation. The same openness brings compromises, covered below, so it is worth understanding both sides before committing.
Benefits of an Open Floor Plan Kitchen
The appeal of an open floor plan kitchen comes down to connection, brightness and flexibility. Each benefit depends on the house itself: where the windows are, how large the combined space will be, and how the household actually behaves day to day. A layout that works well for a family that cooks and gathers together may feel exposed to someone who prefers quiet, separate rooms.
Property value is often cited as another benefit. Open layouts are widely marketed as desirable, but the effect on resale depends on the local market and buyer preferences, and no single figure applies everywhere. Treat value claims cautiously and ask a local agent how buyers in your area respond to open plans before counting on a return.
Light, Flow and Togetherness
Removing a wall lets natural light travel further into the house. A kitchen that once relied on one small window can borrow daylight from a living room with larger glazing, and the combined space often feels brighter and more spacious. Sightlines also lengthen, so you can see from the stove to the sofa to the garden, which makes the home feel larger even when square footage is unchanged.
Flow improves too. Without a doorway to funnel movement, people can move through the space in several directions, and guests can circulate between the kitchen and living areas without crowding a single entrance. This matters most when hosting, because the kitchen stops being a back room and becomes part of the gathering.
Togetherness is the benefit families mention most. A parent preparing dinner can talk with children doing homework at the island, or keep an eye on younger ones nearby. The trade is that the kitchen is now visible, so it needs to be kept presentable more of the time.
Flexible Use of Space
Open layouts give you more freedom to arrange furniture. With fewer walls fixing the positions of doors and storage, you can place a dining table, a sofa or a desk where it suits the household rather than where the walls dictate. A single large room can be reconfigured over time as needs change, such as adding a homework corner or a play area.
Multipurpose zones are a major advantage. An island can serve as a prep surface, breakfast bar and laptop workspace, while a table near the kitchen can work as both dining area and project space. Rugs, lighting and furniture groupings define each zone without building anything permanent.
Small homes can gain the most. Combining a cramped kitchen with an adjacent room eliminates wasted circulation space such as hallways and doorways, and lets one area serve several roles. Where a house opens onto a patio or garden, an open layout can also create a smoother indoor-outdoor connection, especially when the kitchen sits near the doors.
Disadvantages and Trade-Offs
The same openness that makes the layout attractive creates its main drawbacks. The first is privacy. With no walls, there is nowhere to retreat from a conversation, a television or a mess. Dishes in the sink, a cluttered counter or a half-finished meal are on display to everyone in the combined space, and a household with different schedules may find that one person’s activity disturbs another’s.
Noise and smells travel freely as well. Dishwashers, blenders, extractor fans and clattering pans are heard in the living area, and cooking odors from frying or strong spices can drift to sofas and soft furnishings, where fabrics hold them. Good ventilation and quieter appliances reduce the problem but rarely eliminate it, which is why those topics get their own section later.
Climate control and storage are the quieter costs. A large combined volume can be harder to heat and cool evenly than several small rooms, particularly with high ceilings or large windows, so you may need to rethink vents, zoning or ceiling fans. Removing walls also removes the surfaces where wall cabinets, shelving and pantry storage would go, so storage has to be replaced elsewhere. Weighing these against the benefits, rather than assuming open is always better, leads to better decisions.
Is Removing Walls Right for Your Home?
Start with lifestyle rather than trends. If you cook often while others are present, entertain regularly or want to supervise children, an open layout is likely to feel natural. If you prefer to cook alone, host formal dinners with the kitchen out of sight, or work from home and need quiet, the loss of separation may outweigh the gains. Think about a typical weekday evening and a typical weekend gathering, and picture each in the new layout.
Review your current layout before deciding. Note where daylight enters, where the doors and windows sit, which walls hold plumbing or electrical runs, and how much storage depends on wall space. Some homes gain a great deal from opening up, while others have awkward proportions that become less comfortable when combined. Measuring the combined space and sketching furniture placement can reveal problems early.
You also do not have to remove everything. Partial-open alternatives include a wide cased opening, a pass-through or breakfast bar, a half wall, or a glass or reeded-glass partition. These keep some separation, sound control and wall storage while still letting light and conversation through. They can also cost less and involve less structural change, depending on which wall is affected. Households that value both connection and privacy often find a partial opening the best compromise, while those who entertain constantly and have the space tend to benefit most from the full version.
Removing Walls: Structural and Planning Basics
Taking out a wall is a planned process, not a demolition afternoon. The sequence generally runs from assessment, to design and permits, to temporary support, to demolition and structural work, to rerouting utilities and finishing. Skipping the first steps is where the expensive and unsafe mistakes happen.
Start by identifying what the wall does. If it is structural, a beam, posts or other supports will need to take over its load, and that work typically needs a professional assessment and approval from the local building authority. Permit rules vary by location, so confirm requirements with your local office or a licensed contractor before work begins. Wall removal also often means patching floors, ceilings and walls, so budget time for the finishing work as well as the demolition.
Disruption is considerable. Expect dust, noise and a period without a usable kitchen, and plan temporary cooking arrangements. The timeline depends on the scope: a simple non-structural wall can be quick, while a structural change with rerouted utilities, inspections and a full kitchen rebuild takes much longer. Ask contractors for a realistic schedule and allow for delays such as permit processing and material lead times.
Load-Bearing vs Non-Load-Bearing Walls
A load-bearing wall supports weight from above, such as the floor, roof or other walls, and passes it down to the foundation. A non-load-bearing wall, often called a partition, only divides space. Some general clues can help you form an expectation: exterior walls are usually load-bearing, walls running perpendicular to floor joists often are, and walls stacked directly above one another across floors may be. Older homes and unusual construction can break these patterns, so these are hints, not proof.
Do not rely on guesses. A structural engineer or an experienced contractor can inspect the framing, check the joists and roof structure, and tell you whether the wall carries load and what would replace it. If it does, they can specify the beam size, post locations and footings required, and typically supply the drawings that building officials ask for. Removing a load-bearing wall without proper support risks sagging floors, cracking and serious structural failure, so this is not a step to improvise.
Hidden Utilities and Rerouting
Walls often hide more than studs. Electrical wiring for outlets and switches, plumbing supply and drain lines, gas pipes, heating and cooling ducts, and plumbing vents may all run through the wall you plan to remove. Opening it up can reveal surprises that change the scope, particularly in older houses where earlier owners made undocumented changes.
Rerouting these services is usually handled by licensed trades. Wiring may be moved into the ceiling, floor or new structure; ducts may be rerouted or boxed in; and plumbing and vent lines may need new paths. Gas and drain lines in particular have strict rules about slope, venting and clearances, so location changes can add complexity.
Good planning reduces cost and delay. Have trades inspect the wall before finalizing the design, ask them to mark what they find, and consider where you want new outlets for an island or counter. Choosing to place a new island or sink over existing lines, where possible, can limit rerouting, although the layout you want may justify the additional work.
Open Concept Kitchen Remodel Costs
The cost of an open concept kitchen remodel depends far more on the scope than on the idea of “removing a wall.” The main drivers are the structural work, the amount of utility rerouting, the repair of flooring and surfaces, and the level of cabinetry, countertops and appliances you choose. Two projects that look similar on paper can differ greatly in cost because one wall was a simple partition and the other carried the house.
Rather than anchoring on a single figure, build a budget from components and verify each with local quotes. Labor rates, material prices and permit fees differ by region, and the age and construction of your house changes what is behind the wall. Get multiple written estimates that itemize structural work, demolition, trades, finishes and permits, so you can compare like with like and see where the money goes.
Costs rise when the wall is load-bearing, when utilities need rerouting, when flooring must be matched or replaced across the newly joined space, or when you upgrade cabinets and appliances at the same time. They tend to be lower for non-structural walls with few services inside. Set aside a contingency, since hidden conditions such as outdated wiring or damaged framing often appear once the wall is opened. The table below summarizes the main factors.
| Cost factor | What raises it | What keeps it lower |
|---|---|---|
| Structural work | Load-bearing wall, long span, engineered beam, footings | Non-load-bearing partition |
| Utility rerouting | Plumbing, gas, ducts or wiring inside the wall | Few or no services in the wall |
| Flooring patchwork | Mismatched floors, replacing across rooms | Continuous existing flooring |
| Cabinetry and finishes | Custom cabinets, premium countertops | Keeping or refacing existing cabinets |
| Permits and professionals | Engineering drawings, inspections | Simple scope with minimal approvals |
Structural and Renovation Costs
The structural portion usually carries the largest uncertainty. If the wall is load-bearing, you will pay for an engineer’s assessment, a beam sized for the span and load, posts and possibly new footings, plus temporary supports during the work. Longer spans and heavier loads generally call for larger or engineered beams, which cost more to supply and install.
Labor is the other major component. Demolition, framing, carpentry, electrical, plumbing and HVAC trades may all be involved, and the more trades, the more coordination and cost. Drywall repair, painting and ceiling patching follow, and flooring may need to be repaired or replaced to unify the space once the wall is gone, since the old wall line often marks a change in material or level.
Permits and inspections also belong in the budget. Fees and requirements vary by location, and structural changes typically need approval and inspection. Ask your contractor which permits are required, who obtains them, and whether engineering drawings are included in the quote, so none of these appear as surprises later.
Finishes, Cabinets and Appliances
Once the structure is settled, finishes determine how far the total moves. Cabinet choices range from stock to semi-custom to fully custom, and each step brings more sizing options and generally higher cost. In an open layout, cabinets are on show to the whole space, so quality and style matter more than they would in a closed kitchen. Refacing or repainting sound existing cabinets can be a lower-cost option if the layout is staying largely the same.
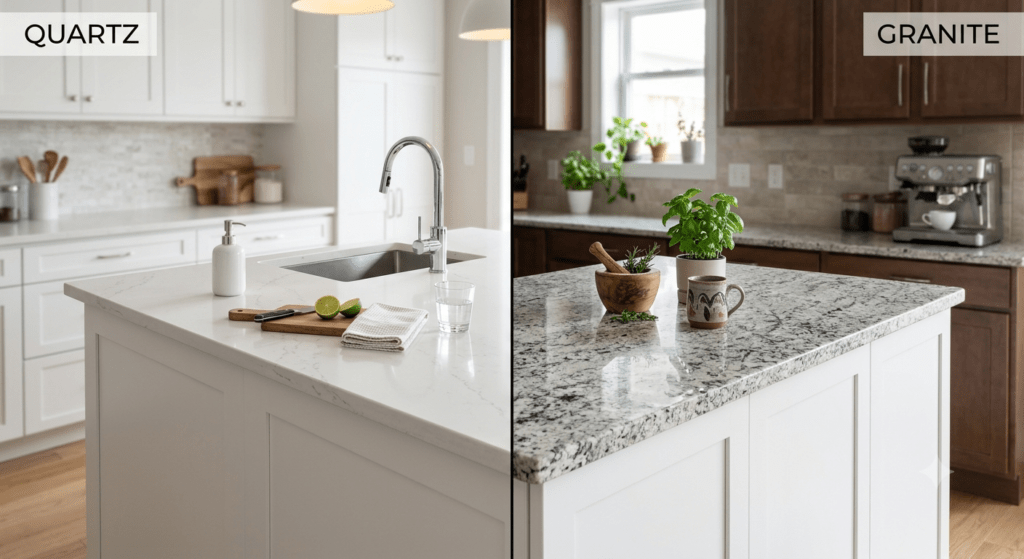
Countertops are another visible choice. Materials such as quartz, granite, solid surface, laminate or butcher block differ in price, upkeep and appearance, and a large island can add significant surface area to price out. Choose materials that suit both how you cook and how the space looks from the living area.
Appliances can be freestanding or built in. Panel-ready and built-in refrigerators, dishwashers and ovens create a seamless look that suits open plans but typically cost more and need precise cabinetry planning. Decide on appliances early, because their dimensions, ventilation and power requirements affect cabinet layout, ductwork and electrical work. Comparing quotes with different finish tiers helps you see where to spend and where to save.
Open Kitchen Layout Options
Opening a kitchen does not dictate one layout. The classic shapes, including galley, L-shape, U-shape and island or peninsula arrangements, can all be adapted. A galley kitchen with parallel runs can be opened at one end to a dining or living area, which improves light and traffic flow. An L-shape works well in open plans because the two counters frame the kitchen zone while leaving the other sides open to the room.
The link to the neighboring spaces shapes the design. An open kitchen with dining places the table or a breakfast bar within easy reach of the prep area, which suits family meals. An open kitchen and living room arrangement relies on furniture, rugs and sightlines to separate cooking from lounging, so consider where the sofa faces and what is visible from it. Peninsulas and islands act as soft boundaries, with seating on the living side.
Scale changes the approach. Open floor plans for small kitchens benefit from compact layouts, light finishes and multifunction furniture so the combined room does not feel crowded. Large open kitchens have the opposite risk: too much space between work zones makes cooking tiring, so keep the sink, stove and refrigerator in an efficient working relationship and use islands or furniture to give the room structure. Sketch a few options with real dimensions before choosing.
Designing the Kitchen Island
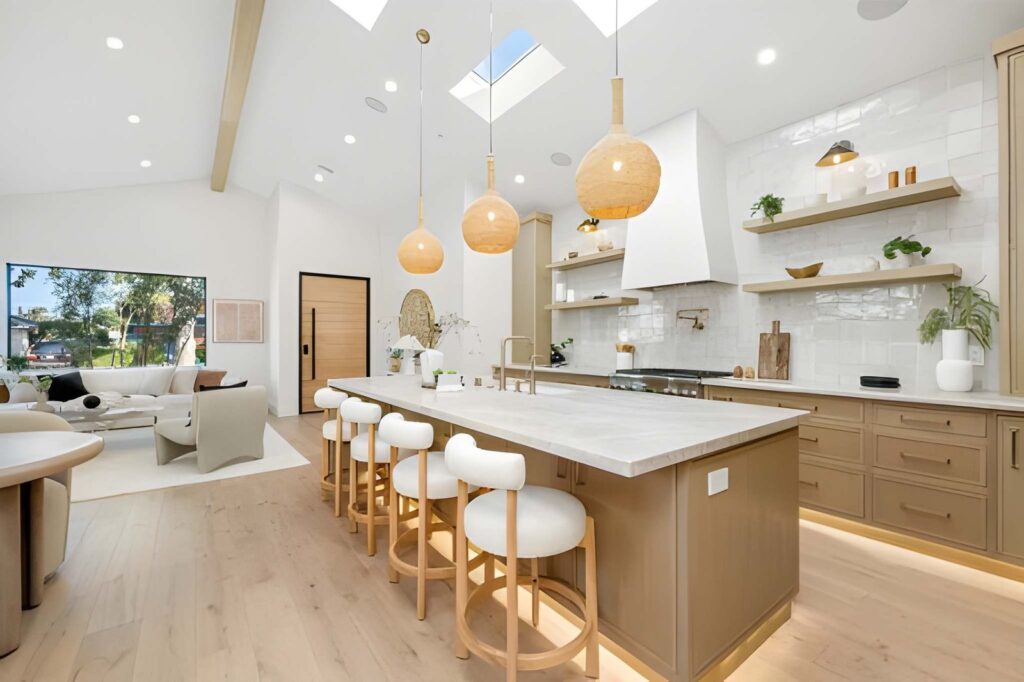
The island is often the centerpiece of an open kitchen, and its size and shape need to fit the room. It requires adequate clearance on all sides so people can move, open appliances and pass each other. Too large an island chokes circulation, while one that is too small looks lost in a big room. Rectangular islands suit most spaces, while curved or L-shaped versions can soften a layout or add seating.
Seating turns the island into a social hub. Bar stools along one side allow guests or children to sit near the cook, and the countertop overhang must be deep enough for comfortable legs. Choose stool height to match the counter height, and consider backs and upholstery if people will sit for long periods. Seating on the living-room side helps define the kitchen boundary.
Storage and function add value. Drawers, cabinets and open shelves in the island replace some of the wall storage you lose, and the surface can host a sink, cooktop, or prep area, though plumbing and ventilation then become more complex. Lighting above, such as pendant lights, defines the zone, provides task light and adds visual interest, and should be sized and spaced to suit the island’s length and the ceiling height.
Connecting Kitchen and Dining Areas
An open kitchen dining layout works best when the route from stove to table is short and uncluttered. Position the dining table close enough to carry dishes easily, but leave space so diners are not in the cook’s path. Rectangular tables often suit long rooms, while round tables can work in more compact or squarer spaces.
A breakfast nook or banquette is a space-efficient way to link the two zones. Built-in seating with storage underneath saves floor area compared with separate chairs, and it creates a cozy spot that feels distinct within the open space. It can also host casual meals so the main table is kept for larger gatherings.
Traffic flow deserves careful thought. Trace the paths between kitchen, dining, living areas and exterior doors, and make sure none cut through the work triangle or the dining space. Leave comfortable clearance around chairs, and consider how doors and appliance doors open. Matching or complementing materials and lighting between the kitchen and dining zones helps the two areas read as part of one scheme.
Design Considerations for Cohesion and Zoning
When the walls go, other elements must do the work of defining each area while keeping the whole room unified. The goal is visual separation without barriers: the kitchen should feel like a kitchen and the lounge like a lounge, yet the space should read as one composition. Zoning is usually achieved through a mix of furniture placement, rugs, lighting and changes of texture or color.
Flooring continuity is one of the strongest tools. Using the same flooring through the combined space makes it feel larger and calmer, whereas changes in material can mark zones but may fragment the room if overused. A consistent color palette ties the areas together, and varying texture within that palette, such as matte cabinets beside warm wood and soft textiles, adds interest without clashing. Repeating a few colors or materials across zones is more effective than matching everything.
Ceilings and lighting add another layer. Layered lighting that combines ambient, task and accent sources lets you shift the mood of each zone, with pendants over the island, recessed or track lights for work areas, and lamps in the lounge. Ceiling treatments such as beams, a lowered section or a different paint tone can subtly mark the kitchen. A single statement accent, such as a bold backsplash, a distinctive light fixture or an eye-catching island color, gives the eye a focal point, but use one or two rather than many so the room does not feel busy.
Managing Light, Ventilation and Noise
Because everything shares one air and sound space, the practical comfort of an open kitchen depends on managing light, air and noise deliberately. Fortunately, each has workable solutions that can be planned from the start rather than added after problems appear.
Light first. Make the most of natural light from existing windows and consider adding glazing where structure allows. Glass partitions or internal glazed doors can borrow light while keeping some separation, and mirrors placed to reflect daylight can brighten deeper parts of the room. Pair daylight with layered artificial lighting so the space works after dark and in dull weather.
Ventilation is the most important functional upgrade. A range hood that is too weak or poorly placed leaves smells and grease in the living area. Choose a hood with enough extraction power for your cooktop and the size of the room, ideally ducted to the outside rather than recirculating, and position it directly above the cooking surface. Check with an HVAC professional on capacity and make-up air requirements, since powerful hoods can affect airflow in a tight house. Cook with the fan on and keep it running briefly afterward.
Noise is harder to remove but can be reduced. Hard surfaces such as stone, tile and glass reflect sound, so soften the space with rugs, upholstered furniture, curtains, fabric panels or acoustic ceiling treatments. Choose dishwashers and range hoods with lower noise ratings, and look at decibel information when comparing models. Running noisy appliances when the household is less likely to be using the living area is a simple behavioral fix.
Storage and Appliances Without Walls
Removing walls removes places to hang cabinets, so storage needs a new plan. Island storage is the usual replacement: deep drawers for pots and pans, cabinets on the living-room side for serving ware, and shelving for cookbooks or baskets. Extending base cabinets, adding a tall pantry unit at one end of the run, or building storage into a banquette can make up the remainder.
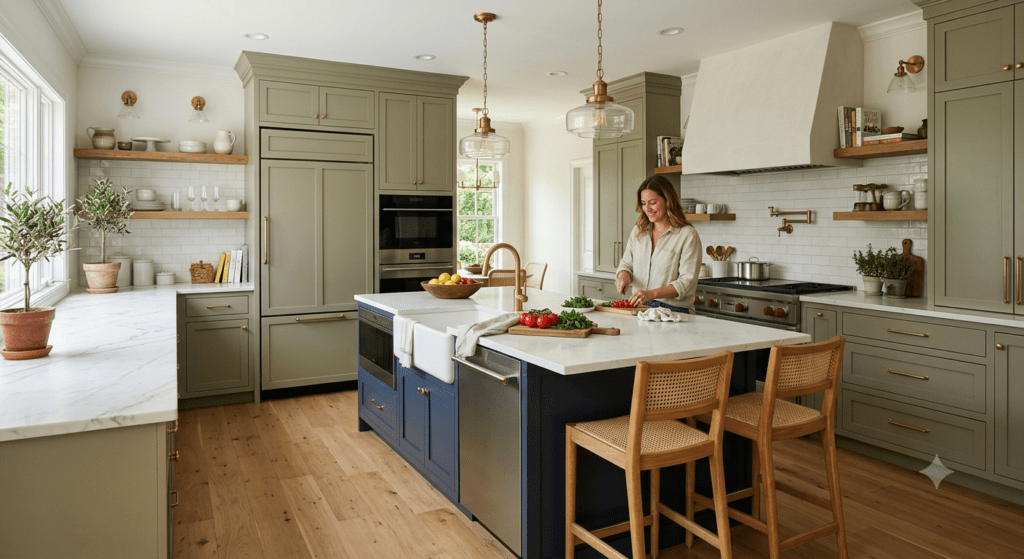
Open shelving is a popular substitute for upper cabinets and brings both advantages and drawbacks. It makes the kitchen feel lighter, gives you easy access to everyday items and lets you display attractive dishes. However, items collect dust and grease, everything is visible, and it demands tidiness. In an open plan, shelves are also seen from the living area, so keep them curated. A mix of closed upper cabinets for clutter and a few open shelves for display is a common compromise.
Appliances are on show in an open kitchen, so their look and performance both matter. Built-in and panel-ready appliances blend into the cabinetry and reduce visual clutter, while smart appliances can offer conveniences such as remote monitoring and alerts, though they add cost and rely on connectivity. Coordinating finishes, whether stainless, black or integrated panels, with cabinet hardware, faucets and lighting gives the room a deliberate look. Choose quieter models where you can, since the sound carries across the whole space.
Open Kitchen Ideas for Small Spaces
A small open concept kitchen can feel larger than the same kitchen enclosed, but it needs disciplined design. Light colors on walls, cabinets and surfaces reflect daylight and make the space feel airy. Using the same palette across the kitchen and adjoining rooms avoids visual breaks that make a compact area feel chopped up.
Transparent or translucent materials help maintain openness while giving some definition. Glass shelves, a reeded or frosted glass partition, acrylic or open-frame stools and glass pendant lights let light and sightlines pass through rather than blocking them. A small island or a slim peninsula with seating can provide prep space and a place to eat without overwhelming the room; a movable cart or drop-leaf table can offer flexibility where space is tight.
Natural elements such as plants, wood tones and woven textures add warmth and softness without bulk. Scale and clutter control are essential, because a small open kitchen is visible from everywhere. Choose appropriately sized furniture, keep counters clear with good concealed storage, and use vertical space with tall cabinets or hanging rails. Fewer, well-chosen items will always look better than many small ones in a compact open plan.
Style Ideas and Inspiration
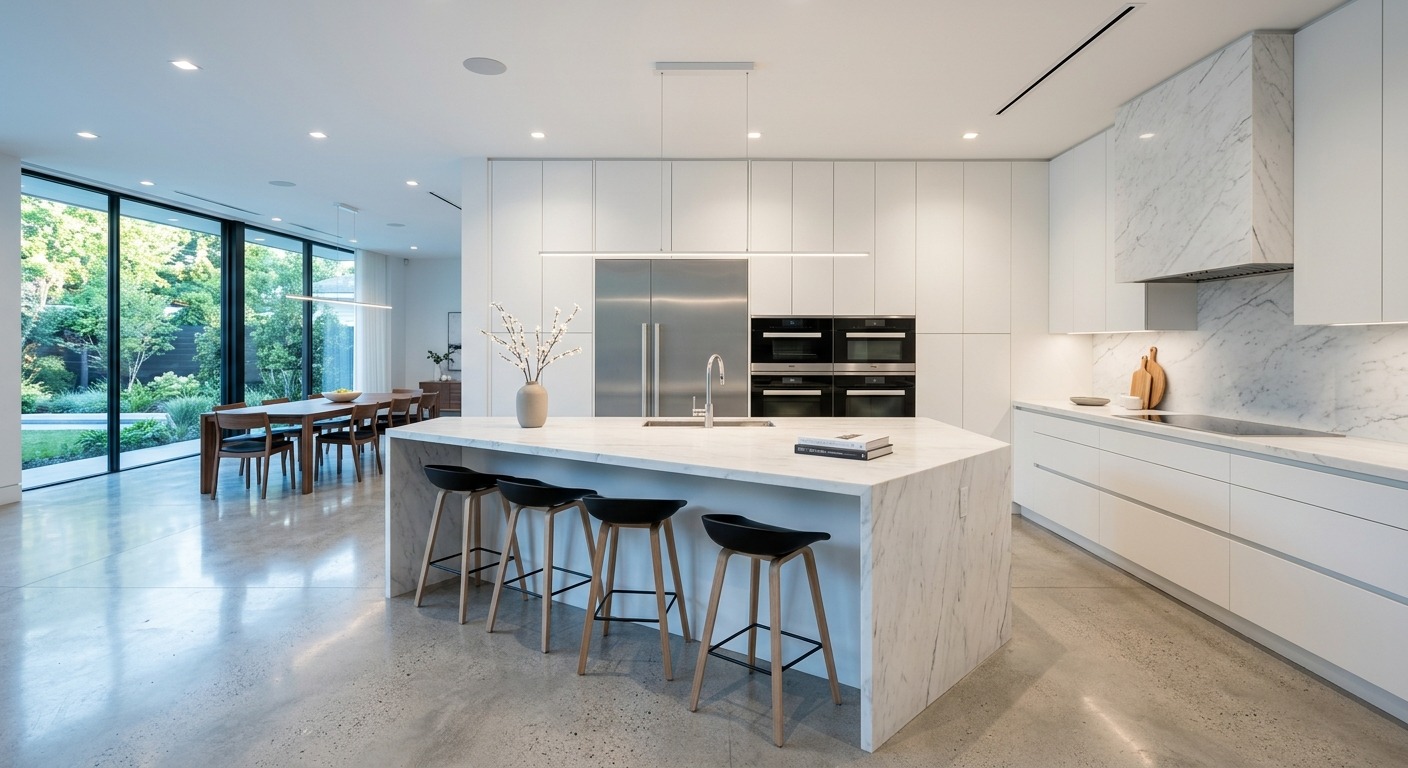
An open kitchen can take almost any style, but because it is seen alongside the living space, the look should work across both. Modern open kitchens often use flat-panel cabinets, clean lines, integrated appliances and a restrained palette. Warm wood looks bring in natural grain on cabinets, islands or floating shelves, balanced with lighter walls to keep things bright. Both styles tend to suit open plans because they limit visual noise.
Colorful schemes can energize the space if handled carefully. A bold island, a vivid backsplash or colored cabinets can anchor the kitchen zone, with neutral walls and floors so the color reads as a feature rather than an overload. Monochrome looks, whether all white, soft gray or deep dark tones, give a calm, cohesive result, and texture becomes the main source of interest through materials such as stone, matte finishes, metal and fabric.
For inspiration, browse photo galleries and collect pictures of open kitchens and open concept kitchen and living room layouts that appeal to you. A saved board of images helps you spot repeating themes, such as materials, lighting or island shapes, and gives a designer a clear sense of your taste. Pay attention to how each photo handles transitions between zones and whether the room has comparable proportions to yours.
Decor choices can unify the zones. Repeat a color from the kitchen in cushions or artwork in the living area, echo metal finishes across light fixtures and hardware, and use rugs, plants and consistent wood tones to carry the scheme through. A few shared elements tie the room together without making it look matched.
Working With a Design Professional
Consider hiring a designer, architect or contractor when the project involves structural change, major layout shifts, or coordination across several trades. A designer can help with layout, finishes and lighting, while an engineer or experienced contractor handles structure. Even if you plan to do some work yourself, bring in professionals for load-bearing walls, gas, major electrical and plumbing changes.
Come prepared to the first meetings. Bring measurements or existing plans if available, photos of the current space, images of styles you like, a list of how you use the kitchen, and a realistic budget range with some contingency. Note your priorities, such as seating for a certain number of people, storage needs, or